I love Facebook.
It took me a while to figure it out but once I started adding friends and family and regularly updating, it became fun. And a really great way to connect with people I, unfortunately, lost touch with over the years.
But as I'm not a college student any more, some of the settings befuddled me for a while. Then I started reading about privacy settings and such. I found an out-of-date article on how to update the privacy settings and after playing around a bit, got them figured out.
And I thought I'd share them. Because, Facebook uses your real name. That is the advantage of it. That lets people find you.
But sometimes there are things you really don't want to share with the rest of the world. I'm not overly afraid of internet predators but I do believe in being cautious. That means I may list the area of the country I live in, but I don't list the town. And I don't list the birthdays or names of children. (And if you are a professional, then you do want to limit what pictures your boss can see of your recent drunken bbq!)
(And, when you have a moment, read this post to see more about an incident I had with posting my pictures of my kids online and watch this video.)
Ok, ok.
You use Facebook and you want to be a little more cautious with the information you are putting out there.
This is some basic information on how to do that. (This is written in March 2009. If Facebook changes their interface, I'll try to come back and update images, etc.)
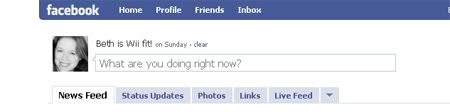
Here I am.
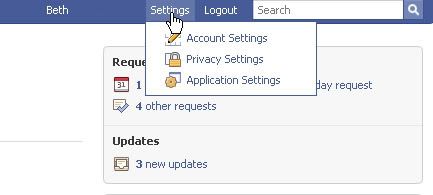
The very first thing to do is click on the Settings over on the right top. And click on Account Settings.
Then click on Password and change that IF it's the same as your email. If you are like most people, you use the same password for a lot of things. (and actually this is a good tip for anyone, change your email password to something unique and different. If someone gets into your Facebook account, or any account, then can then easily get into your email and do some real damage without you ever noticing it. )
Once you click on settings, you'll come to this screen and click on password. So, change this password. (And change your email to something different.)
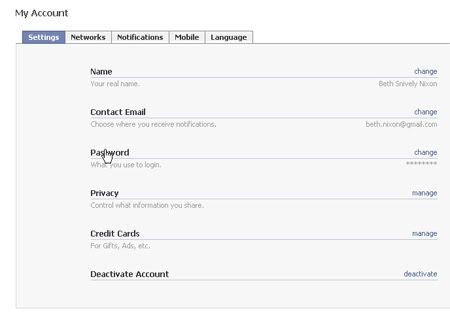
After you've done that, while you are still under My Account, (I didn't include directions for that as it's pretty standard) go to the next tab, Networks.
By default, Facebook includes you in a geographic network near where you live. I live by a big city. I actually don't want everyone that lives around here able to see my information by default.

Just opt out of any networks. (Or add them here if you do want to be included. But a little bit further down, I'm going to touch on groups and that way you can limit if your entire network can see everything you post.)
Still under My Account, now click on over to the Notifications tab. This one is pretty important. This shows you when you will be notified of certain activities. The important things? Under Photos. Be sure to click ON if someone tags you in a photo. Same with video. ("Tags me in a photo")

That way you will be alerted if a friend has posted a photo and tagged you in it. Believe me, you want this.
First, it's fun to see photos of yourself.
Unless you are, let's say a teacher. And the photo is from an old college party where you were showing off how well you could do shots of tequila.
You may want to un-tag yourself and ask your friend to either delete the picture or restrict privacy or just leave your name off it. Whatever you are comfortable with.
Because here's something I didn't know. The DEFAULT setting photos is to allow EVERYONE to see them. So if your friend has the default setting on, everyone will see you doing those shots of tequila!
(And, again, I'll talk about groups in a minute. That will tell you how you CAN post pictures of yourself in those tequila situations and limit the visibility to only certain friends and not everyone!)
I did tag a friend in a photo that she then untagged. (and yes, you can do that! If you don't want to be tagged, you'll see an option, below right on the photo, to un-tag yourself. ) It was my mistake and I should've known better as she doesn't post pictures of herself or her family online. I have since deleted the picture.
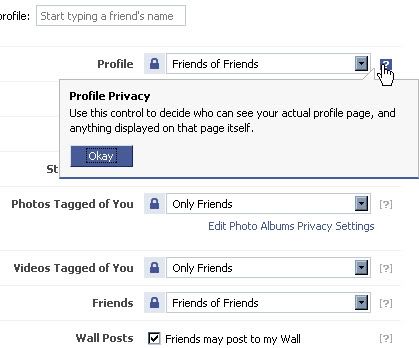
Ok, next is Privacy Settings. Up on the upper right, click Settings and then choose Privacy Settings. 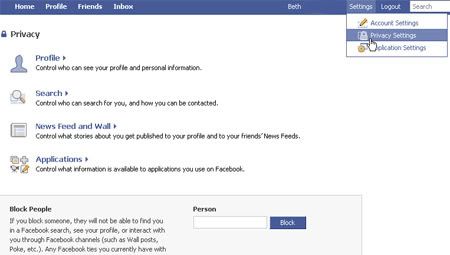
First, choose Profile. This is where you can choose what people can see what. Your options are "Friends of Friends", "Only Friends" and for some of them "Customize."
I've chosen Only Friends for most of them. Besides profile. I figure if it's a friend of a friend, it may help them determine if they really know me!
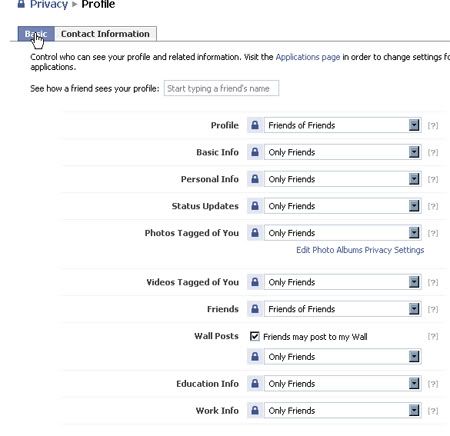
And if you aren't sure what something is, see that little question mark to the right? Click on it and a short definition will appear.
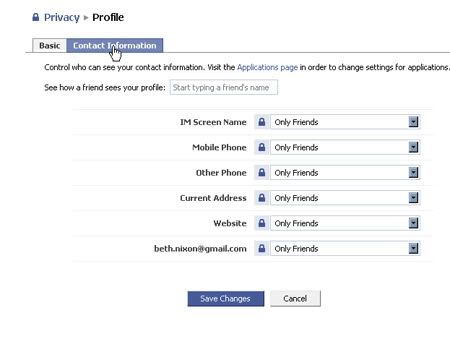
Stay under privacy, but now click on the Contact Information tag. Choose which settings make you comfortable. I actually don't want most people to see my information. Although some can be changed to No One. Limiting access completely! Just choose what makes you comfortable.
Ok, next is understanding Friend Lists and putting people in groups.
First, why would you even want to put people in groups? Well, let's say you found a really great picture of you and your best friends from high school. You could set it so only your high school friends could see it. Maybe it's a picture you don't really want your boss or the other moms from play group to see.
It's a great option to have.
First, on the top bar, click on friends. You'll see your friends with their latest status updates. (just a note, on my examples here, I've whited out names so it may look just a little weird.)
On the left, you'll see Friend Lists.
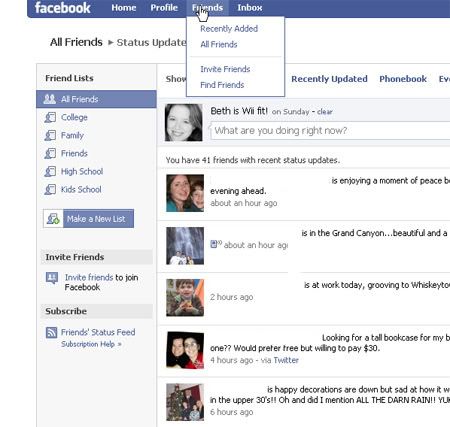
Clicking on All Friends, give you a list with all your friends.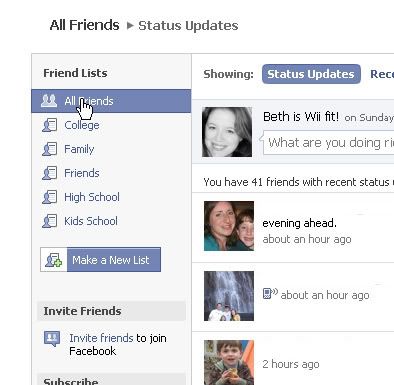
I have several groups set up. Below, I clicked on Family. That shows everyone on Facebook that is in my extended family.
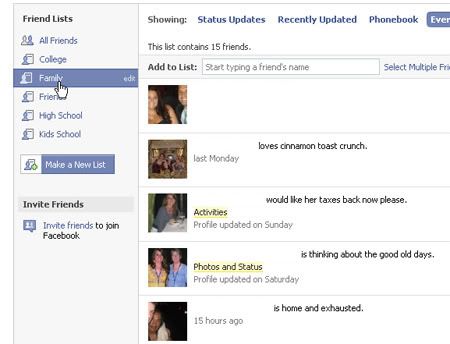
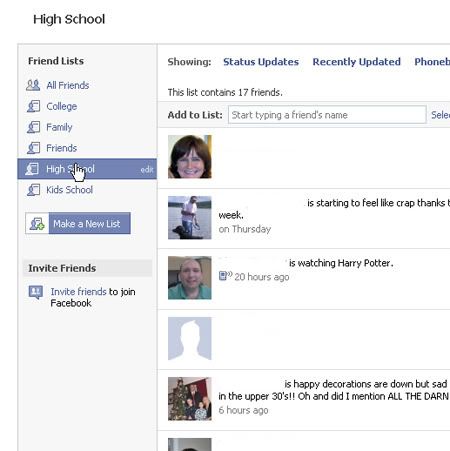
I've also got lists for high school, college, and parent's from the kids school.
So, here's how to create your own group.
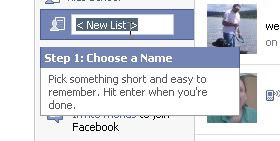
Below the Friend Lists, you'll see a blue bar that says "Make a New List."
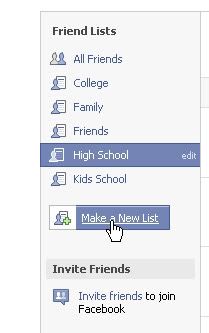
Click on that and choose a name! Make it simple and self explanatory. (I named this one "Test" for this example.)
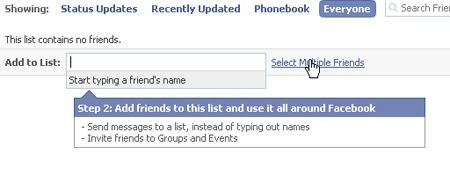
Next, you'll have an option to add people to your new group. You can do it one by one, or click on the link for Select Multiple Friends.
Then just click on anyone that you want to be in that group! (again, my list below looks a little odd because I've whited out all names, etc. You would have names next to each of your little thumbnail pictures!)
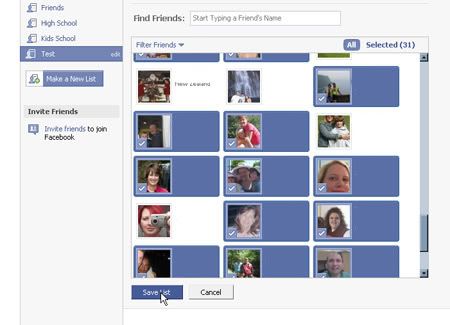
Then click Save List!
That's it. You've just created a group.
Ok, now where do you use this? There are several ways but the most important, to me, is photos. (I think you can edit just about everything to certain groups and they would follow these same general guidelines.)
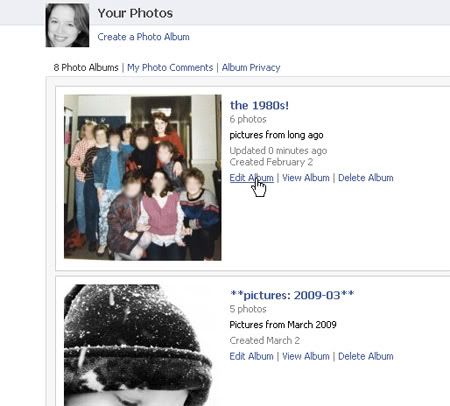
Go to Your Photos. There you will see all your albums. And as the default setting is to allow your photos to be seen by EVERYONE, if you want a different setting, you have to make the change to EACH album.
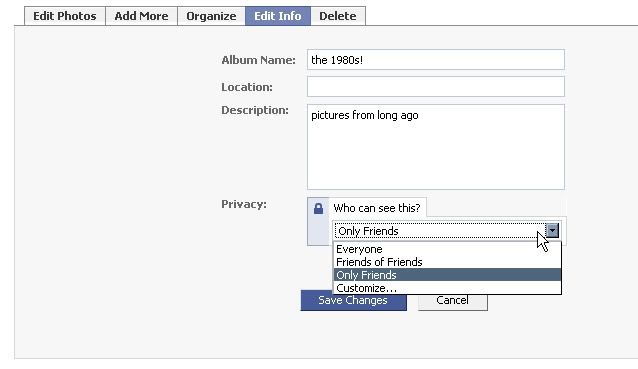
Here I'm going to change the settings to my album, "the 1980s!"
Click on "Edit Album."
That brings up this set of tabs. Click on "Edit Info."
This brings up the place to change the Album Name, the album Description, and the Privacy for that particular album.

Click the drop down for Privacy. I usually pick "Only Friends." For most of my pictures, if you are my friend on Facebook, I'm ok with you seeing pictures. (although I still don't list my kids names or specific locations (like schools or cities) on my pictures)
Ok, let's say you have a picture of a wild college party that you really don't want anyone in your family to see but you know your college friends would love to see it.
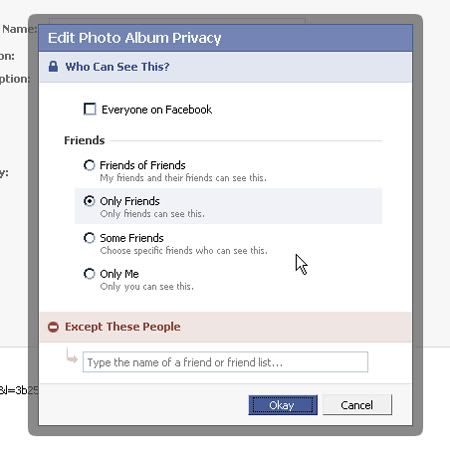
Click "Customize . . . " on that drop down box above.
This is what will come up. And now you can customize it using those groups you just created! You can see your options below.
Everyone on Facebook, Friends of Friends, Only Friends, Some Friends, Only Me, and even the option to block only a certain few people . . . like your boss!
For this example, I'm choosing Some Friends.
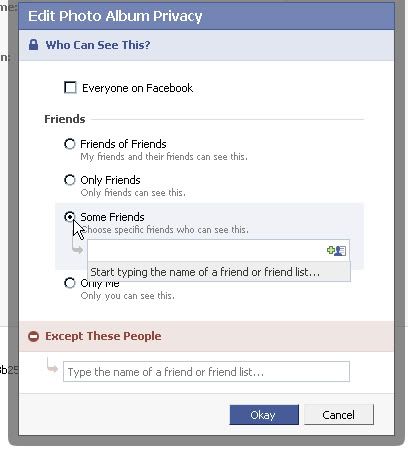
And when the box comes up, I can type individual friends names OR I can just type in the name of the Friend List I just created!
Here I typing in Test, the new group I created for this example.
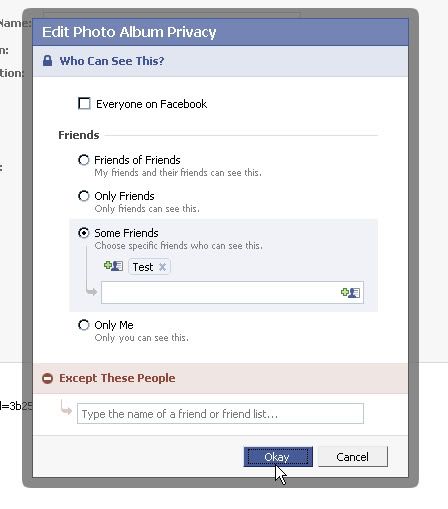
And there you go! Click Okay and now these pictures will ONLY be visible to that group of people!
Be sure to do this to each individual photo album you have. Change the settings from Everyone on Facebook to something that you feel comfortable with.
Hopefully that will give you enough information to take a look at your settings, and change things to where you are happy with what people are seeing and make sure that only those that you want to see things, will.
And a quick note to those of you with young teenagers. These settings are not a secret. They will know about them WAY before you do. So, if you have a younger teenager, you may want to ask them to show you their privacy settings so you will know what is and isn't going on with them. Because even if they are your friend, they can very easily block you from seeing pictures and other information. That discussion is best left between you and your child but now you have the information to approach them if you think it's necessary.

