Thursday, July 31, 2008

You're Gonna Miss This {plus Print It Now 2 FREEBIE}

{edited to include freebie only}

And that's where my next freebie comes in! All those digital pictures sitting on your computer? Because you have plans to do it someday or plans to do something with them? Forget it.

Concentrate on RIGHT NOW. Download this second set of frames, pretty 'em up with them (and the first set), add dates and a line of journaling if you wish, and PRINT 'EM!

NOW! Enjoy them NOW . . . not next week or next year.

Forget scrapping each one to artistic perfection or just thinking you'll get to printing them . . . someday.

Just stop thinking about it and 12 other things at the same time. Do it.

Now!

Here's the preview:

DOWNLOAD IT HERE.
(link will be good until the end of August or so)

Enjoy and have a great day!

Sunday, July 27, 2008

Favorite Thing . . . {and a FREEBIE, Summer Joy!}

{edited to include freebie info only}

Onto important things . . .

My freebie, Summer Joy, is ready for download!

You can see the layout I made with it here. It has pinks, greens, browns, and a splash of yellow. Beads and glitter. Flowers and more!

DOWNLOAD IT HERE.
Link will be good until the end of August or so.

Enjoy it! And, if you like it, post a comment. Send me a link to a layout you create!

Show your love and I'll keep making more for you all!

You all enjoy the rest of your Sunday and Monday too.

Enjoy the freebie . . . "see" ya all soon!

Sunday, July 20, 2008

the Winner is . . .

I had 48 entries into the Neglected Beauty Contest.  I went to random.org and plugged in the numbers and the winner is???

Lucky #2!!

Victoria, you are my winner! Please send me an email to beth.nixon.blog@gmail.com and I will get busy arranging your prize of a $10 gift certificate to the digi-scrap site of your choice or amazon.com!

Congrats and thanks to ALL of you who played along.

There were some really amazing thoughts and some that really touched me.

Thanks for sharing!

I'll be back tomorrow with, hopefully, a few pictures of our trip to New Hampshire (what a beautiful, beautiful place) and whatever else I can dream up!

You all take care and have a nice evening.

Monday, July 14, 2008

Bethy's Tutorials: Shadow Power! (shadows on their own layer)

Adobe Photoshop CS2 has a fantastic option. (maybe earlier versions, but I don't have any earlier versions to check) The ability to put the shadow on it's own layer. Now, that's power!

Now, with anything in Photoshop, there are infinite ways to do things.  This is just the way I've discovered works for me.  And, the concepts can often be adapted for use in other programs. 

Ok, you know those super cool frames that look like they are curled right off the page?  Well, this is how I go about creating one.

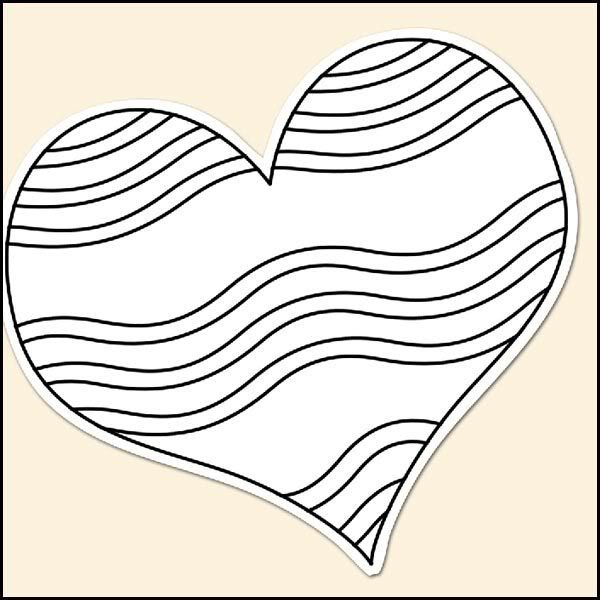
First, I draw out my shape.  I curve two of the edges in a bit as something that's curled off the page, wouldn't be straight anymore! (Click on any of the pictures to see them bigger. )
frame1

Then I just add a basic shadow. Nothing fancy yet.  Now, see that little "f" the red arrow is pointing to?  (layer effects) Right click on that.  Towards the bottom (third from the bottom, in fact) you'll see "Create Layer". Click that.
(*see bottom for a more in-depth explanation of creating layers of your effects)frame2

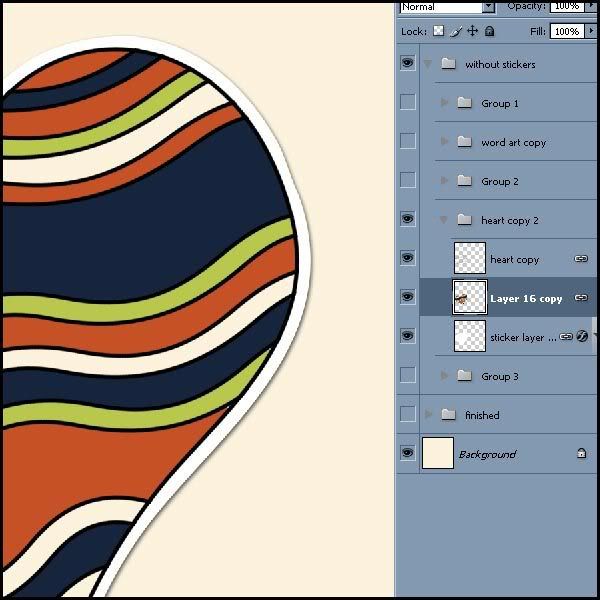
So, now you'll have this. See how the frame and the drop shadow are on separate layers?
frame3

Here's just the frame with the eye (visibility) turned off on the shadow layer.
frame4

And here's just the shadow with the eye (visibility) turned off on the frame layer.
(remember, click on any image to see it bigger!)
frame5

Ok, now you have the POWER! You can manipulate that shadow anyway you want and NOT mess with your original image!

My favorite tool is Warp.  I click on the shadow layer, go to Edit > Transform > Warp and just have fun!
And I usually decrease the opacity to about 40% or so, but eyeball it for your project!
frame6 

See how it looks like it's curling off the page?  Except for one problem.  What I'm trying to create is a frame that is part of the photo.  I don't want a curled frame that's laying on-top of a photo, know what I mean?

But with the shadow on it's own layer . . . well, that's not a problem!

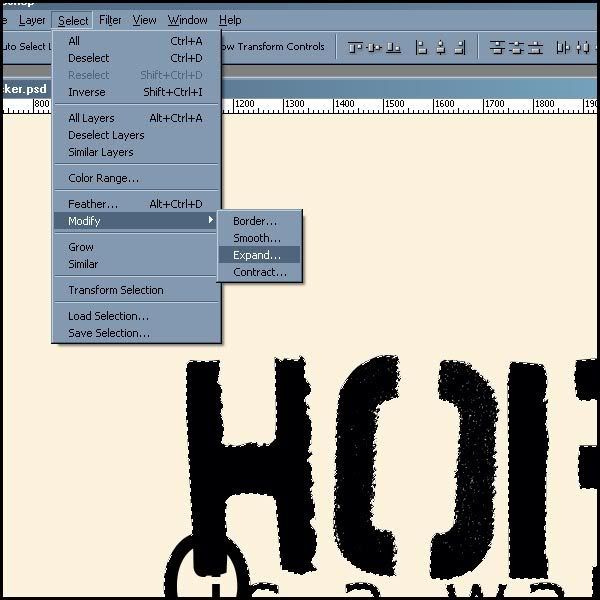
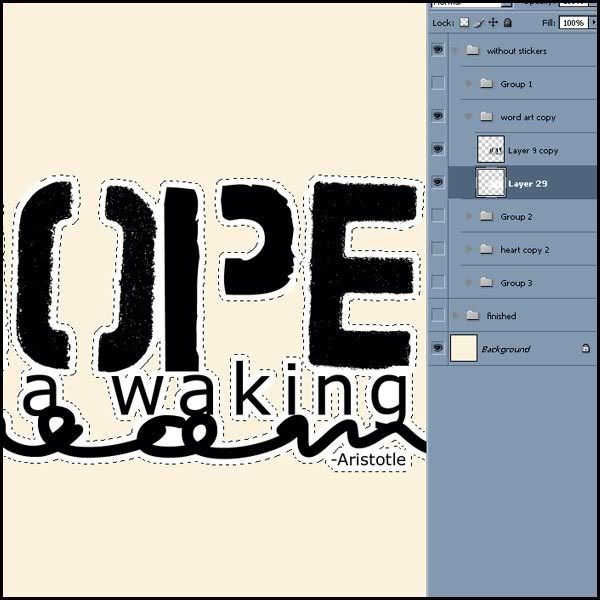
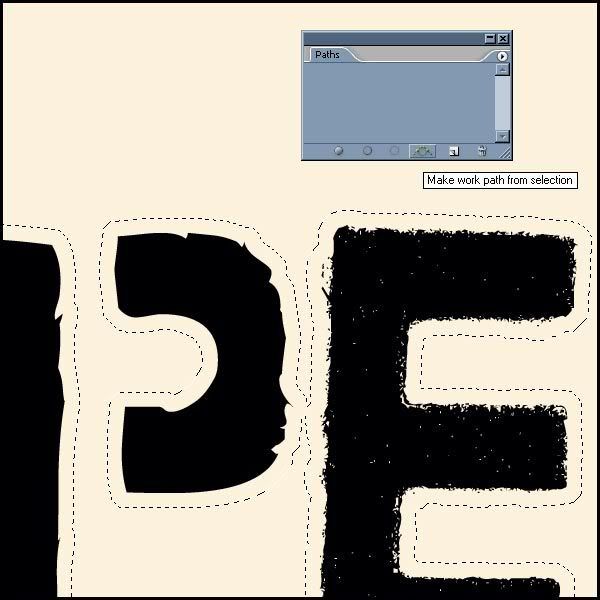
I do a very rough selection . . . just selecting any shadow that is INSIDE the white frame.
frame7

And delete!
frame8

Ok, that looks a bit funny, doesn't it.  Just sitting on the background like that.  But wait until you put a photo underneath the layers and crop it to be inside the white frame.
frame9

My three layers, (frame, shadow, photo) now look like one image.  All curled up on the light blue background!

Detaching the shadow from your object is a very powerful way to manipulate it to look like a real 3-d object!

*A little bonus information on that little "f" (layer effects) and "Create Layer" that's especially important when dealing with a more complex creation.  ANY style you've added to the object will become it's own layer when you click "Create Layer".  If you are working on a more complicated image that has effects, when you click on that "Create Layer" option, ANY layer effect you've added will become it's own layer.  So, inner shadow, bevels, glows, gradients, strokes, ANY you used, are ALL going to become their own layer!  You could turn one innocent little object into a confusing mess of layers!

Figuring out the shadow, warping, bending it to my will, is usually one of the last things I do.  So, I "set" the layer without the shadow THEN add the shadow and get it on it's own layer.  What does "set" mean?

Anytime you have layer effects on an object, when you manipulate the object, the effects change accordingly.  The way *I* stop those changes, when I don't want them to change anymore, and make them part of the object and not just a layer effect is to "set" it.

For shadow manipulation, I add all my layer effects EXCEPT shadow.  When I'm happy with it, I duplicate it.  (I always duplicate because I hate making PERMANENT changes to anything!!)  I turn the visibility off of the original and work with the duplicate.  I put a blank layer above the duplicate and merge the two together. (Layers > Merge Layers)

Those layer effects are now PERMANENT!  That means I can NO longer adjust them.  (that's why I make the duplicate, just in case I change my mind!)

Now, I go ahead and add the shadow.  When I right click on that "f" and "Create Layer" I get only two layers . . . the object and the shadow.  Not a mess of layers.

This all sounds pretty complicated.  And it's NOT necessary . . . just makes it easier when I'm working with a more complicated piece with lots of layer effects involved!

Hope you all have fun manipulating and bending those shadows to your will!

Friday, July 11, 2008

I Need To SHUT-UP {plus Print It Now FREEBIE!}

{edited to include freebie info only}

Well, I created these to do just that in just a few clicks! Now, I can plop these fun frames on my photos, add a few simple words, if I want, and send them off to get printed! I'll fill up my 4"x6" album in no time and STILL feel like I've added my special creative touch!

You can DOWNLOAD THE FRAMES HERE!
(link will be good until mid-August or so)

And, please, let me know if you like them! I had LOTS of fun creating them and will put together more if you all like 'em!

So, leave me a comment . . . a link to anything you create . . . cause that lets me know you want more!

If you post online, credit:
Print It Now 1 by Beth Nixon
and, if allowed, post my blog address:
http://bethnixon.blogspot.com

Ok, that last part was fun . . . posting the freebie.

You all have a GREAT Friday!

Tuesday, July 8, 2008

Other

Here's a catch-all for all the posts that don't fit into a neat category.

Thanks for checking in!

Monday, July 7, 2008

Bethy's Tutorial: Sticker-ize an Element! (with Ready Made Layout FREEBIE!)

Ok, I'm not sure sticker-ize is even a word but here's how to take a graphic element and make it look like a sticker!

Below is a finished layout using some elements from an old kit of mine.
(and yes, this layout is the freebie!)

And all the elements used are what I call out-of-the-box.  Meaning I didn't change them at all, except for two pieces.  Let's take a look at the layout BEFORE I changed anything . . . before I sticker-ized it!

The word art and the heart are graphic elements.  No shadows, no depth.  They lay flat on the background.  And in this layout, them make is seem confused and certainly don't add anything, as is, to the layout!

I'm going to show you how to sticker 'em in Photoshop.

Remember, with Photoshop and all programs, there are many ways to get the same thing done. I'm going to show you how I do it, but you may find an easier way. And what works in Photoshop, well, the ideas will easily translate into most programs!

First, with your magic wand tool, select the element you want to make a sticker.

Then go to select > modify > expand and expand your selection by about 15 pixels.

Add a layer beneath your object and fill it with white.

Add a shadow and your done! But if you have Photoshop, I'm going to show you a little tip to make it just a bit better. Take a close look at the white. Can you see how it's just a big jaggy. It's not enough to drive me crazy, but it is enough to bug me! So, we're going to use paths to fix that right up.

Go back to where you just made your selection 15 pixels bigger. Open your Paths window. With those marching ants going around, click on the fourth button at the bottom of the Paths window, Make work path from selection.

This is what it'll look like.

Make sure you are on a blank layer underneath your element and that your foreground color is white. Then click on the first button on your Paths window, Fill path with foreground color.

(tip: in your paths window, click anywhere off the work path selection to have the path line disappear.)
Add a shadow. And take a close look! See how much smoother that is!

I did the same thing with the heart element. Selected the heart, expand the selection, convert to a path, fill with white, add a shadow.


Then I added some color. By adding a new layer, between the heart and the sticker layers, I was able to select individual areas and fill away!

Making a sticker is easy.  Adding the extra path step will just push your element creation to the next level!

Just for reading through the tutorial, I've uploaded the layout I made as a ready-made layout freebie!  It's 8"x8" at 300 dpi with room for four pictures! Just plop four of your favorite photos on a layout below the png file included in the zip and you have a layout ready to go!

DOWNLOAD IT HERE!

Enjoy!