Ever seen those dramatic pictures using selective coloring? Where only one part of the photograph is in color? There are several ways, as is always true in Photoshop, to get that effect. But my favorite way is to use a mask. I never really understood masks (still don't fully understand all they can do) but it does make for a REALLY easy way to create selective coloring on your photograph!
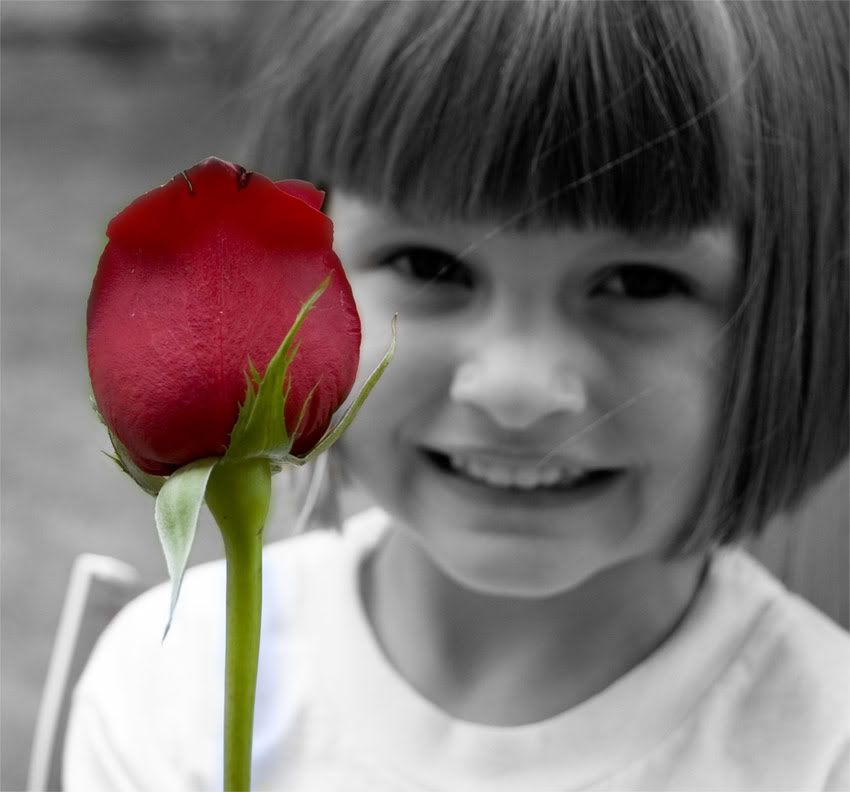
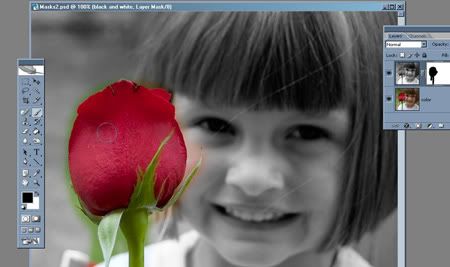
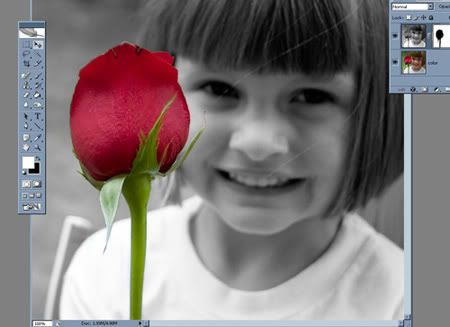
Not sure what selective coloring is? The first photo below is full-color. The one just below it, I converted the photo to black and white and left the rose in full color. So, let's see one way we can do that! 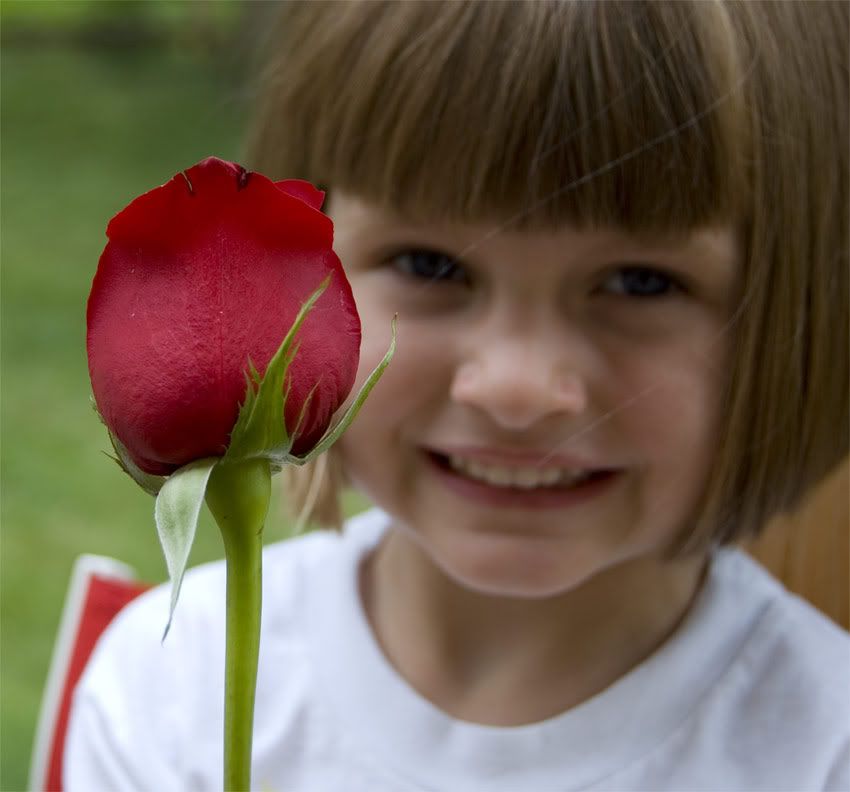
Step 1
Pick the photo you want to play with. Name it color or whatever works for you!

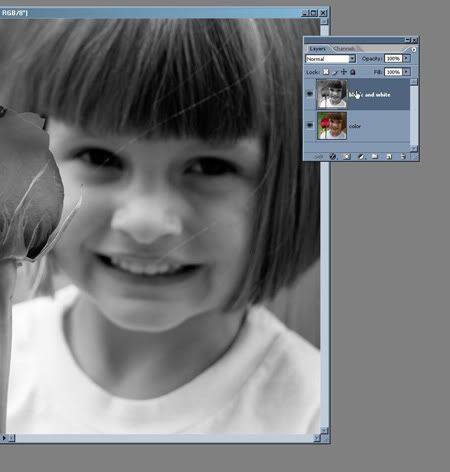
Step 2
Duplicate the photo. Convert the one on top to black and white. (and creatively, I named that layer black and white)
(I like the black and white action I downloaded from the Pioneer Woman's Photography blog.)
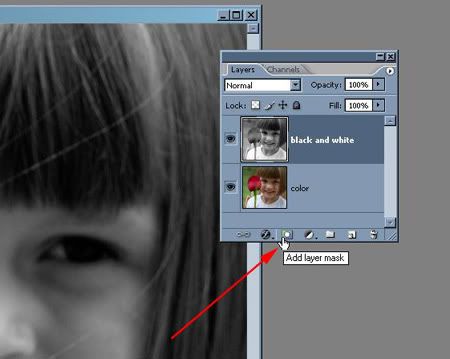
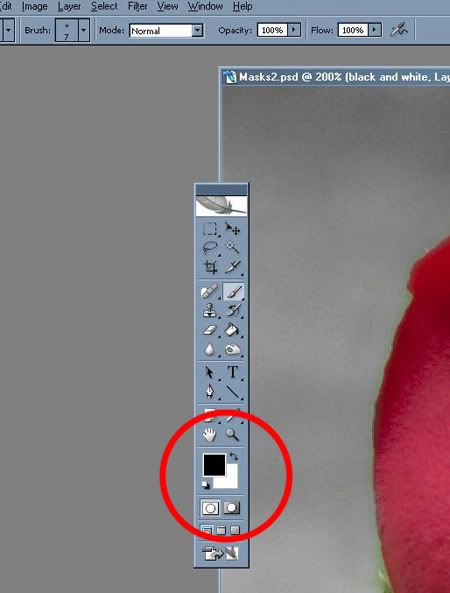
Step 3
With the top layer (black and white) selected, click on "Add layer mask" (the third icon from the left on the bottom of the layer palette)
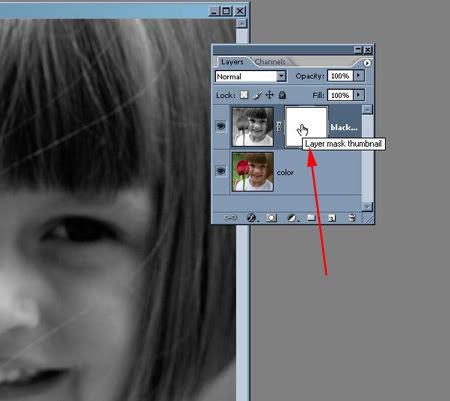
Step 4
You can see below that the mask is now added to your black and white photo. Click on the white box. (the layer mask thumbnail)
(and note, any time you do other things and decide to come back to the mask, be sure to click on that white box, the layer mask thumbnail. Otherwise you are just activating the layer and not the mask. What we want, when working with the mask, is to be sure the mask is active.)
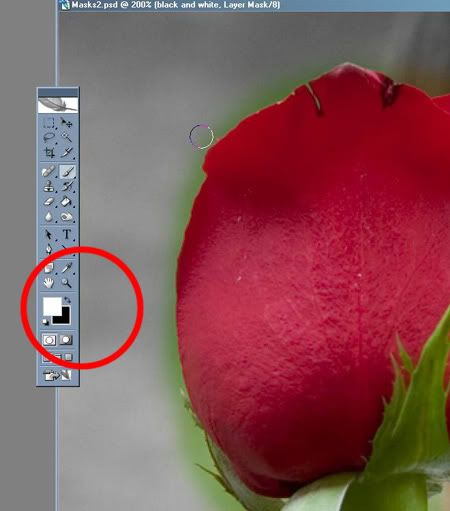
Step 5
Select a soft, round brush at a size that works for painting over the area you are working on.
Be sure that you have BLACK as your brush color.
Why black? Because this is how a mask works . . . the mask is on top of your black and white layer. When you paint on your mask with black, it's like erasing the black and white layer and showing what's underneath (the full-color photo in our example).
When you paint on your mask with white, it's like it's restoring the black and white layer as the top layer.
SO . . . black paint, seems to erase the top layer . . . white paint puts it back on.

Step 6
Start painting with that black brush! No need to be terribly careful. We can fix that later. Just brush about and get the area covered.
And check out that white layer thumbnail next to the black and white layer. See how what I've painted in black, shows up on the thumbnail!
Step 7
Ok, time to fix what I "over-painted".
I just switch to white, and paint over my mistakes. It's like putting the black and white layer back!
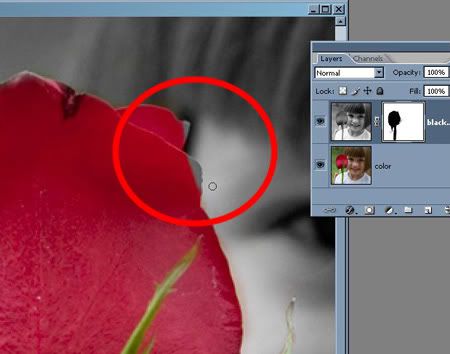
Step 8
Make a mistake?
See what I did below? I painted a little too much white and turned the edge of my rose back to black and white. Can you guess what I need to do?
Step 9
Switch back to black and fix it up!
Step 10
Just switch back and forth between black and white while the layer mask thumbnail is activated.
Black will "erase" the black and white layer to show the layer underneath.
White will "restore" the black and white layer to hide the layer underneath.
Zoom in real close to get tiny details. And keep playing until you are happy with the results!
Is this all necessary?
Nope. I used to do selective coloring by layering a black and white photo over the coloring and actually erasing my black and white photo in selected spots. BUT, if I make a mistake? It's harder to fix. This sort of re-touching is actually fun and not nearly as tedious as it's so easy to fix mistakes!!
Have fun with it . . . and if you do use the tutorial . . . let me see the results!! Leave me a link so I can come ohh and ahh!

3 comments:
Great Tutorial Beth! But also such a lovely photo, her new haircut is just so so cute!!
Thanks for the great tutorial! Very clear and informative.
Thank you for the tut.
I'm a beginner and I love your easy to do tut.
Post a Comment